'ATAPIDUINO'
This project makes the Arduino work as a simple ATAPI controller for a CD-ROM drive. It implements the following functions: PLAY, PAUSE, RESUME, NEXT, PREV and EJECT/LOAD.It has no own display -yet- but when connected to a PC the Arduino will communicate via the 'Serial.print' function the progress of CD-ROM initialisation and echo the operations started when a push button is pressed to command the CD-ROM. Also basic current track infromation is displayed. I found that not all CD-ROM drives react the same to ATAPI commands and that they differ also in their response speed.
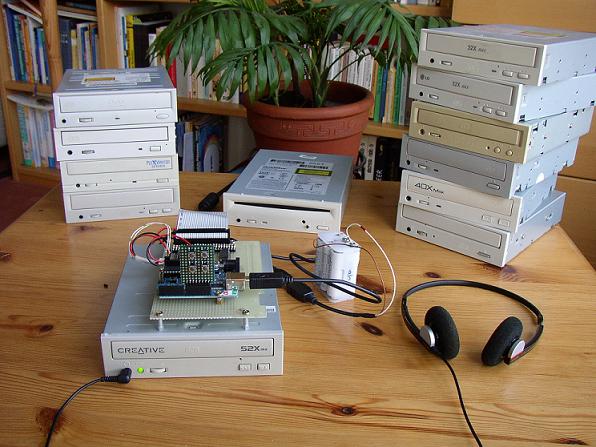
The sketch was tested alright with the following drives:
- LITE-ON LTN-403L 2000
- Aztech CDA 668-01l 1995
- LITE-ON LTN-486S 2001
- LG CRD-8320B 1998
- LG CRD-8521B 2001
- CREATIVE CD5233E
- Hitachi CDR-8130 1997
- SONY CDU5211 2001
Following CD-ROM/ DVD drives did not work:
- LG CRD-8322B
- Goldstar CRD-8240B/8241B
- Samsung DVD master 8E SD-608
- Toshiba XM-6702B
- Plextor PX-W2410TA
The LG CRD-8521B is a bit special, it will get stuck if no CD is placed in the tray before it
initialises. Even the drive's own eject button will not respond. To overcome this situation
keep the drive's eject button pressed while resetting the Arduino. This will open the tray and
a CD may be inserted. Besides this it works fine and supplies my headphones while typing this
lines.
The Arduino interfaces to the IDE connector of the ATAPI drive via three PCF8574 I/O expanders
which provide the necessary 24 I/O pins. Each PCF8574 I/O expander interfaces to a part of the
IDE signals. The expanders have the addresses 20, 21 and 22 (hex).
Addresses 20h/21h interface to the lower/upper 8 bits of the data BUS (DD0-DD15).
Address 22h combines the addressing of the ATAPI register set, the read and write strobe signals and the hardware reset pin of the IDE.
>
Addresses 20h/21h interface to the lower/upper 8 bits of the data BUS (DD0-DD15).
Address 22h combines the addressing of the ATAPI register set, the read and write strobe signals and the hardware reset pin of the IDE.
The schematic of the IDE interface is basically the same as the one presented in example 21.1 of
John Boxall's great introduction to
Arduino and I2C.
For a test I did connect the 24 LEDs to the outputs of the PCFs and ran the script provided by John for the example. Later the LEDs were replaced by pull-up 4K7 resistors. These are not reflected in the schematic and as far as I could experience they are not necessary, at least not with 4 inches long 40 pin IDE cable.
For a test I did connect the 24 LEDs to the outputs of the PCFs and ran the script provided by John for the example. Later the LEDs were replaced by pull-up 4K7 resistors. These are not reflected in the schematic and as far as I could experience they are not necessary, at least not with 4 inches long 40 pin IDE cable.

Connection to Arduino is simple, the I2C signals SDA/SCL from the IDE controller interface connect to
Arduino pins 4 and 5.
Aditionally ground and +5V from Arduino are needed as well, that's it.
On the Arduino some push buttons are required. These are wired so that when operated the corresponding Arduino pin (8 to 12) is connected to ground triggering the desired function.
Aditionally ground and +5V from Arduino are needed as well, that's it.
On the Arduino some push buttons are required. These are wired so that when operated the corresponding Arduino pin (8 to 12) is connected to ground triggering the desired function.
Taking it into Operation
Connect the IDE cable to the CD-ROM drive, make sure the jumper at the rear of the CD-ROM drive is set to select it as master. Power up the Arduino first and then the CD-ROM drive. Of course, the CD-ROM drive needs its own power supply!It is recommended to have a CD in the tray at the beginning. First time connect the Arduino also to the PC, download the sketch and open the serial interface.
In case the sketch is already on the Arduino do the same but reset Arduino after powering the CD-ROM.
Whenever the Arduino reset button is pressed, a consequent hardware reset is issued to the ATAPI interface too. This is acomplished by shortly setting port 5 of the I/O expander (Addr.22h) to ground. The attached drive should (regardless of being or not a compatible one) react with the same characteristic noise as when it is first powered on. This is a good but not exhaustive test that proves Arduino is communicating with the I/O expander and that a least the wiring to the nRST pin on the IDE ATAPI interface is correct. Should this not be the case revise the wiring.
Here is the first sketch: Atapiduino R1.0.

If a CD is in the tray and all goes well something like this should come up:

Play operation starts when the PLAY button is pressed. Pressing PLAY toggles between playback and hold.
Pressing NEXT or PREV will move the pickup to the corresponding track and continue play operation.
NEXT and PREV will advance to the first or last track respectively once the track limits are reached.
On the PC the Arduino serial interface monitor (if connected) will display the triggered action and the current track number.
It is possible to use NEXT or PREV while the drive is either stopped or paused. In this case the pickup is moved to the desired position leaving the drive in pause mode. A short burst of audio may be heard. This happens because while stopped or paused, the NEXT and PREV functions are performed by shortly going into play mode and pausing after having reached the desired pickup position. I intend to better this sometime if I find a way...
As can be seen in the pictures above, a small board with 4 push buttons was improvised to test it. The 'PREV' button is missing and the function was tested using a crude cable jumper. Do not hold push buttons down for too long, debouncing is implemented in a very simple way.
A word on the audio quality of CD-ROM drives; Although a few perform amaizingly well
even on headphones in general audio quality is far from being 'high-end'. Some are very noisy some are good.
If the DAC inside the drive is tapped directly at its output (hard to find!) with
well shielded cables and connecting it to a
Lampizator, excellent sound quality can be achived.
Another option may be to use the digital out (TTL S/PDIF) convert it to standard SPDIF and interface it to a good DAC. Here is a collection of suitable TTL to standard S/PDIF converters.
Another option may be to use the digital out (TTL S/PDIF) convert it to standard SPDIF and interface it to a good DAC. Here is a collection of suitable TTL to standard S/PDIF converters.
Update August 2nd 2011
Experiments show that the length of the IDE cable connecting Arduino with different drives matters. Using longer connector cables of about 14" (~35cm) may lead with certain drives to erratic or no operation at all. I found this while testing the SONY CDU5211 drive which only obeyed when connected via the short cable. I guess a look into the ATAPI spec. will reveal how to correctly terminate the different signals...Update June 22 2012
Thanks everyone for the interest in this project.Inspired by this resonance I have tried further to make the code compatible with as many drives as possible. The result is the new Atapiduino R2.0 sketch that now works fine for nearly all my drives.
Among 13 different drive types, 9 work flawlessly, 2 work but have issues reading the TOC
correctly:
the Goldstar CDR-8241B(CDP) and the AZTECH CDA668-01l (1995) -maybe they are mechanically worn out-.
The Samsung CD-Master 48E (Model SC-148) will only work when a CD is in the tray before Atapiduino initialises it. This behaviour plagued the LG CRD-8521B with Atapiduino R1.0 but is now cured in R2.0.
Finally the HP drive GCE-8486B, the only one found to use 16 byte packets, refuses to read the TOC. This one was manufactured 2004, it is the youngest among the 13.
Note that after Atapiduino initialises the drive it will ask for a CD to be inserted. At this time
the CD tray must be opened using the drive´s eject button. This is because the SW has not yet fully
initialised at this stage. After initialisation the Atapiduino EJECT button is the one to use.
I will try to refine the Atapiduino SW further...

And here is R2.0 sketch.
And here is R2.0 sketch.
Adding an LCD
Update July 22 2012
Since the project already uses the I2C interface, the obvious choice was to connect the LCD using the same interface.For long I was uncertain about deciding which library to use since I had the impression the choice would narrow down the HW choices as well. Luckily there is the LiquidCrystal library created by F. Malpartida. This is a great library amongst others because it offers a wide range of possibilities for interfacing with LCDs. One of them for the I2C interface based on the PCF8574. It allows free choice on how the PCF8574 is connected to the LCD. That is, what pins on the PCF8574 are connected to which pins on the LCD module. The library can be downloaded here.
Check: Dowloading and Installation section under Index. It is meant to be a drop in replacement to the standard LCD library that comes with the Arduino IDE.
In the project the SainSmart I2C LCD2004 adapter is used, a fine example on how to use it can be found in the Arduino Forum.
>>> Note that the pin definitions specify the PCF8574 port numbers and not the pin numbers! <<<
Connecting the LCD to the Atapiduino is very simple, just connect the power supply and the SDA and SCL lines of the LCD module to the Atapiduino, that's it.

To go with it we need a new sketch: Atapiduino R3.0.
With R3.0 Atapiduino has been reworked. Appart from supporting the LCD, the way Atapiduino now communicates
with the CD-ROM drive is more 'mature'.
Unfortunately the only two DVD drives Atapiduino has been connected to did not work. Don't know if this is the same with all DVD drives but in theory they should support audio CD playback like CD-ROM drives.
Note also that Atapiduino is just a 'CD-player'. It uses the ATAPI interface for the basic audio CD functions. Although feasible it does not make use of data transfer capabilities from the disk via the ATAPI interface other than for reading TOC data or drive identification. Data or DVD disks cannot be read with Atapiduino as it is now.
Atapiduino uses only the PIO data transfer mode. The much faster DMA mode is not used as the I2C interface is too slow to justify DMA mode anyway.
What it can do:
During initialisation Atapiduino will indicate -if a valid ATAPI drive was detected- the result of the device's self diagnostic and briefly display the drive model found. ATAPI specifies 40 bytes for model data, most manufactures seem to stay below 16 so, in most of the cases, the model is correctly displayed.
Note that a drive may fail the self test but otherwise work allright.
After initialisation Atapiduino will either promt 'NO DISC' or display the track range and the total playing time of the loaded disc. With this version the drive's or Atapiduino's EJECT/LOAD buttons can now be used indiferently. So there is no need to load a disc first time using the drive's EJECT button.
Atapiduino will also accept 80 mm audio discs and CD-Rs. If the drive does not support CD-R it may react weird. It may take many attempts to read the TOC, sometimes failing, sometimes with success. Try a normal audio CD to check this. The Aztech CDA 668-01l from 1995, my oldest CD-ROM drive taught me this and this behaviour made me earlier assume it was worn out or broken, while it just disliked CD-R discs.
During PLAY or PAUSE mode the current track and the absolute time position are displayed and continuosly updated. This data is also updated when NEXT and PREV are used.
A little 'bug' may be encountered with some drives:
When pressing NEXT or PREV while stopped, Atapiduino will go to the selected track and remain in PAUSE mode. If STOP is pressed again, the drive will stop but some drives leave the pickup at the last reading position so, that when NEXT or PREV are pressed again, the track count and playback will start from this position rather than from the first track.
Still after pressing STOP, PLAY will always start from the first track.
Don't expect the drives to react immediately to a pressed button. I2C interfacing to the CD-ROM and continuos update of the LCD slow things down. Allow for up to half a second while pressing buttons. The good side of it: No need to debounce keys :-)
By the way, the sketch will also work if there is no LCD connected.
Update July 28 2012
The more elaborate the Atapiduino code, the more the reaction to ATAPI commands starts differing from drive to drive. The ATA Packet Interface for CD-ROMs specification (SFF-8020i) is quite 'open' to interpretation. So the implementation on the drive's side varies among manufacturers.This differences have become obvious in the drive's returned 'Audio Status Codes' which sometimes differ. So the HITACHI drives report to be paused after issuing the STOP-unit command to them (audio status 12 instead of 15) so the STOP-disk command was added to really make them report stop. Also some drives report different Audio Status Codes when stopped, some may return 13 some 15.
Last no least, I inadvertedly replaced the RESUME funcion call in R3.0 by a PLAY funcion call. This had the effect that returning from the paused mode from some part in the track into the play mode, it would always resume play from the start of that track. All this made R3.1 necessary and here it is:
Atapiduino R3.1

List of the Atapiduino R3.1 Compatible Units
- LITE-ON LTN-403L (2000)
- LITE ON LTN486S (2001)
- HITACHI CDR-8130 (1997)
- HITACHI CDR-8230 (1997)
- LG CRD-8320B (1998)
- LG CRD-8322B (1999)
- LG CRD-8521B (2001)
- LG GCE-8527B (2005)
- SONY CDU5211 (2001)
- CREATIVE CD5233E (?) (Starts PLAY instead of remaining paused when NEXT/PREV is used on stopped unit)
- BTC F563E (2001)
- TEAC CD-532E (2000)
- SAMSUNG SC-148C (2001)
- AZTECH CDA66801I (1995)
Non Compatible or possible defect Units
- Toshiba XM-6402B (1999) (fails init proc.)
- H.L Datastorage GCR-8481B (2002) (fails init proc.)
- LG DVD-ROM Drive GDR-H30N (2007) (fails init proc.)
- Compaq CRC#D-8241B (1998) (erratic, defect?)
- COMPAQ CR-588 (1998) (erratic, defect?)